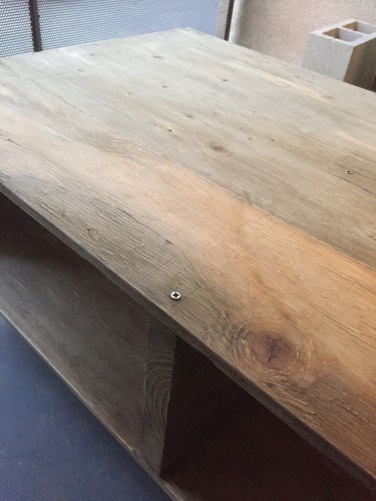
With 2 boys and limited space, I want bed frames that are both sturdy and functional plus easy to make and affordable. So I decided to build a simple platform Twin and Toddler bed frame with open storage. This is my first DIY project and these were my internet inspirations. RED, BROWN
This project per bed took me @1 day to build, and @2-3 days to sand, stain and finish. I will detail the staining and finishing experience in another post. In the meantime…
Let’s get to the building materials and supplies needed in a nutshell.
TODDLER
2- 1/2 inch Plywood sheets, cut 29in wide x 52in long
1- 2x12x8 @29 inches long , cuts 3
Wood Screws- 2 1/2 – 3 inch long
Wood Glue- Your choice
TWIN
2- 1/2 inch Plywood sheets, cut 39 inches wide x 75 inches long
1- 2x12x16 @39 inches wide, cuts 4
Wood Screw- 2 1/2 -3 inch long
Wood Glue- Your choice
Now for those who like me, could use some explaining, below are details -with pictures!
Regarding the Lumber — You will need to purchase 2 full sheets of at least 1/2 inch thick plywood for the top and bottom of each bed. 1 sheet is @48 inches wide and 96 inches long. Plenty of wood. I asked my local Lowe’s guy to cut the 2 sheets of plywood to the dimensions I needed. There will be wood left over. If you’d like, save that extra for a smaller project. I did! and will post soon.
You will also need to purchase 1- 8ft long block of common wood (Toddler) 16ft long(Twin) at 12 inches high and 2 inches thick of Green Douglas Fir (Lowe’s) or Pine(Home Depot). These will make up the sides and center of the bed (aka support). 8 ft will allow you to cut 3 pieces @29 inches each piece for the toddler and 16 ft will allow you to cut 4 pieces @39 inches each piece for twin. The 12 inch height allowed for a greater storage space but you may go for a lower height. Again, my local Lowe’s guy did the cutting. Thank you Adam!


Wood Screws —You will need to buy 2 1/2 inch to 3 inch long wood screws. In addition to the length, there are various size screws to consider as well. It measures the thickness of screw and width or diameter of the screw head. 6, 8, 10, 12 even 14. This was perplexing because no one mentioned this part in their blogs or videos. I mean no one. Not even Ana. Perhaps it is common knowledge. But not for this sister. I opted for size #10 in part, on the advice of another shopper dude in line with me at checkout. He told me it didn’t matter what size I chose. The screws are there to keep everything together until the glue dries. Enough info for me.
Wood glue — I used Titebond II and Elmer’s Wood glue. I switched to Elmer’s because it claimed stainability.
I forgot to mention a good, reliable crew is great to have as well. This is mine. They work for food.
Once we got the hang of drill bits and driving bits, torque, speed and pre-drilling, everything was easy peasy, for the most part. There was that time we googled ways to unscrew stripped screws. Below are pictures of the toddler bed project. The twin build has an identical process except it is bigger with an extra set of storage space.
Overall this was a very simple weekend project. I am very happy with the results. You may think, nice, but it looks like a table. Once the kid grows out of the toddler, I plan to use it as such or a day bed, oooh the possibilities. For now, I plan to place baskets underneath when I find or make the right ones.
Thank you for reading. I hope my experience here (at least) cuts in half your trips to the hardware store, saving you time and gas. At most, may you be inspired to start what you’ve only thought about till now.
Check out Farmhouse Dreams On An Apartment Budget for more DIYing it.
Thanks for reading,
altesa.
P.S.
My DIY Epiphany: Just start. You’ll be glad you did.


One thought on “DIY Easy Peasy Twin Storage Bed and it’s Mini Me”