Oh The Places You’ll Go/ Limitless Learning


Learning how to read opens up one’s eyes to all the world.

Quite literally in this case.

As a result of my son’s newfound reading ability, we stumbled into a fun activity that turned into an interactive, educational expedition around the world (while at home). Let me tell you all about it.

(Think:  “If You Give a Mouse A Cookie” Storybook by Laura Numeroff)

My son began reading the “made in” labels on the back of his toys— because he could. (Cool.  Sparks).  That lead to reading the labels of his stuffed animals (more sparks), then his clothes (more sparks).

Because most of the labels read “Made in China”, he had questions like “Why is everything made in China?!”, “Why isn’t anything made in the USA? ”

(I smell smoke).

Good questions son.

(Time for mama to fan the flame.)

I answered his questions and made a few suggestions that involved competition and counting. (Remember, I’m the fanner of the flames.)

“Let’s make a chart. How many things can you find that are made in the USA?”

“Let’s locate the places you find on the map.”

He began to expand his search around our home for “made in” labels. (Even his little brother got in on it.) They found places all over the globe. It was eye opening to find things from Indonesia, Brazil, Mexico, India, El Salvador, Vietnam, Philippines… from clothes to shampoo bottles, we were living internationally without having stepped outside. (He found 3 “Made in USA” labels and 20+ international labels in our home.)

Of course that lead us to locate each place on the globe,

then to write down and tally our findings,  

which lead to a comparison chart,

which has the potential to lead to probability and percentages. 

You may also dive into categorizing the items found by how they are used or materials,

Or

You may look into the manufacturing process: the steps it takes to get into an American store. 

You can also learn the number of languages in each country, a day in the life, their money system, gross national product.

The possibilities for exposure and learning are non stop. It’s what I call a “limitless learning” opportunity because it has no end.

I wasn’t fully aware of it at the time but from that one activity we covered reading, geography, math, economy, manufacturing, mass production, social studies, research and statistics.

Not bad for a day’s work. This was a Saturday by the way.

There are still more places to go with this activity for beginner readers testing their skills to teens interested in global economics.

That’s what a child’s interest or sparks does, it takes them places.

As a homeschool mom, I’m so glad I get to be the tour guide & (fanner of the flame.)

Where has your child’s curiosity taken him or her?

What limitless learning experience you encountered that was sparked by an interest? 

-Altesa

Mommy Playdate

What started out as an idea for a cute Instagram picture turned into a full blown wedding photo shoot and what I am predicting a movement amongst mommies to relieve stress.  
Inspired by my friend’s Instagram post where she described a way cooler pretend play time with her boys after adding a doll that looks a lot like her to the mix of their testosterone-centric superheroes, I pulled my doll from the closet.  Bridal Barbie was given to me by my sister eight years ago as a wedding gift.  My husband owned a Tuskegee Airmen G.I. Joe that we picked up from a Goodwill nine years ago.   It was only natural for them to get married.  They have been living together for so long now, yeah, it was about time.

Boy did I have fun.

Along with my two boys, I pretended for a few hours while arranging these two love birds.  I hadn’t played like that in a very long time, not with dolls.  It was amazing how quickly my brain connected to the little girl.  Only now I was a little girl with a camera.  This simple act brought such joy to my heart.  This short lived moment will live for ever in my mind and in pictures. It not only lifted my spirits but reminded me of the power of images and play. When you place them together. Whoa Baby!  I foresee a lot more mommy play dates in my future.

There was a natural progression between set ups.  They became like real people with real personalities.  I was in full throttle play y’all.

I began to think of all the standard “wedding day” poses between bride and groom, like the “before” shots where couples each stand unseen on either side of a door holding hands to share an intimate prayer prior to the ceremony.  Or the “eavesdrop” shots where the couple’s private moments are captured.  Or the “reception” where bride and groom let their hair down in full celebration mode.  The ideas were endless.  If my boys had not begun complaining about food and something of the other, I would probably have a 1,000 pics instead of 250!  Don’t worry, I only shared a few on this post.

Check out the photo shoot. Do you think I can add wedding photographer to my list of skills?

The Before:

The After:

img_7534-1img_7551IMG_7590IMG_7607IMG_7609

The reception:


IMG_7696

The eavesdrop:

IMG_7708IMG_7700IMG_7712IMG_7720

and of course no event is complete pretend or real life without…

The selfie:

Hope you are smiling and inspired as I was to create these images and this post.

IG: @altesabaker

love,

altesa

What About Those Chairs?: Farmhouse Dreams On an Apartment Budget

IMG_7392.JPG

Bringing my farmhouse dreams on an apartment budget to life one DIY project at a time.

Next up: The chairs.


It all comes down to a vision.  When I lock into one, it’s on and the real fun begins.

Re-upholstering the kitchen chairs was one fun project to undertake especially since my vision included mismatched seating and building two new stools to complete the refinished table project.

Let’s begin with the inspiration:

This beautiful dining setup took my breath away. Besides the rush of natural light, the mix of bright and bold print along with the weathered table and chairs is a winning combo in my book.  I had to have it and since this particular print is way above my budget, I had to adjust.  Hey, I’m used to fiscally adjusting, so it’s no probs.

Next it was time to shop for prints:

I knew I wanted bright and bold floral types of print.  I always intended to use table cloths or shower curtains for my upholstery fabric since it is easy to wipe down.  I still have two young boys who have holes in their chins.   No luck with the laminate table cloths (absent of cute prints) or outdoor fabric (expensive) but found the mother lode in affordable, beautiful, water and stain resistant cotton table cloths at Marshalls, TJ Maxx, Ross and Burlington Coat Factory.  In the end I used both table cloths and a shower curtain! (Yep. can you tell which one?) to upholster the stools and re-upholster the chairs.  Remember these aren’t your mama’s shower curtains.

Next it was time to purchase and cut wood for the 2 bar stools I was building:

The two bar stools were built using these plans from Rogueengineer.com.  Although I made my seating a bit wider than their plans called for, I loved their easy, simple, visual instructions.  As a newbie it worked perfectly.

IMG_7310.JPG
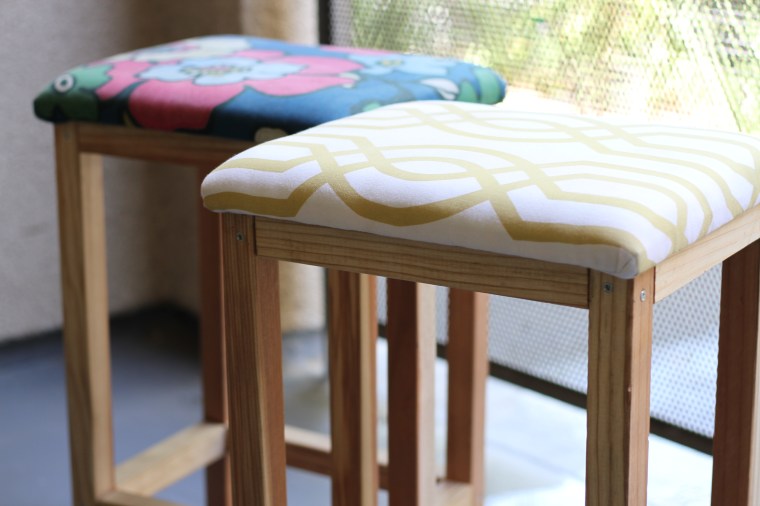
For the seats, I used left over plywood from the storage bed build project and had it cut to size at Lowes.  I also loaded up on a staple gun and staples.  Then off to buy batting and foam from the fabric store.  Since the two original chairs already had batting and foam, I only needed to cut off its old fabric, measure and staple the new.

Taking out the staples on my two kitchen chairs were probably the most challenging part of this upholstery project. Oh yeah, choosing which fabric would go where was a bit exhaustive not from intensive labor but from indecisiveness and fear of making a bad choice.  In the end, I am satisfied.  My farmhouse dreams on an apartment budget are shaping up.

img_3199

Thanks for reading,

altesa.

My DIY Epiphany: Trust your instincts.  Take the risks.  You have the advantage of changing something you don’t like anytime you choose.


DIY Easy Peasy Twin Storage Bed and it’s Mini Me

IMG_2960.JPG

With 2 boys and limited space, I want bed frames that are both sturdy and functional plus easy to make and affordable.  So I decided to build a simple platform Twin and Toddler bed frame with open storage. This is my first DIY project and these were my internet inspirations. RED, BROWN

This project per bed took me @1 day to build, and @2-3 days to sand, stain and finish. I will detail the staining and finishing experience in another post. In the meantime…

Let’s get to the building materials and supplies needed in a nutshell.

TODDLER

2- 1/2 inch Plywood sheets, cut 29in wide x 52in long

1- 2x12x8  @29 inches long , cuts 3

Wood Screws- 2 1/2 – 3 inch long

Wood Glue- Your choice

TWIN

2- 1/2 inch Plywood sheets, cut 39 inches wide x 75 inches long

1- 2x12x16 @39 inches wide, cuts 4

Wood Screw- 2 1/2 -3 inch long

Wood Glue- Your choice

Now for those who like me, could use some explaining, below are details -with pictures!

Regarding the Lumber —  You will need to purchase 2 full sheets of at least 1/2 inch thick plywood for the top and bottom of each bed. 1 sheet is @48 inches wide and 96 inches long. Plenty of wood. I asked my local Lowe’s guy to cut the 2 sheets of plywood to the dimensions I needed. There will be wood left over.  If you’d like, save that extra for a smaller project.  I did! and will post soon.


You will also need to purchase 1- 8ft long block of common wood (Toddler) 16ft long(Twin) at 12 inches high and 2 inches thick of Green Douglas Fir (Lowe’s) or Pine(Home Depot). These will make up the sides and center of the bed (aka support). 8 ft will allow you to cut 3 pieces @29 inches each piece for the toddler and 16 ft will allow you to cut  4 pieces @39 inches each piece for twin. The 12 inch height allowed for a greater storage space but you may go for a lower height.  Again, my local Lowe’s guy did the cutting.  Thank you Adam!

IMG_2818
2x12x8 common wood
IMG_2817
12 inches high

Wood Screws —You will need to buy 2 1/2 inch  to 3 inch long wood screws.  In addition to the length, there are various size screws to consider as well.  It measures the thickness of screw and width or diameter of the screw head. 6, 8, 10, 12 even 14.  This was perplexing because no one mentioned this part in their blogs or videos. I mean no one. Not even Ana. Perhaps it is common knowledge.  But not for this sister.  I opted for size #10 in part, on the advice of another shopper dude in line with me at checkout.  He told me it didn’t matter what size I chose. The screws are there to keep everything together until the glue dries. Enough info for me.

Wood glue — I used Titebond II and Elmer’s Wood glue.  I switched to Elmer’s because it claimed stainability.

I forgot to mention a good, reliable crew is great to have as well. This is mine. They work for food.

Once we got the hang of drill bits and driving bits, torque, speed and pre-drilling, everything was easy peasy, for the most part. There was that time we googled ways to unscrew stripped screws. Below are pictures of the toddler bed project. The twin build has an identical process except it is bigger with an extra set of storage space.

Overall this was a very simple weekend project. I am very happy with the results. You may think, nice, but it looks like a table.  Once the kid grows out of the toddler, I plan to use it as such or a day bed, oooh the possibilities.  For now, I plan to place baskets underneath when I find or make the right ones.

Thank you for reading. I hope my experience here (at least) cuts in half your trips to the hardware store, saving you time and gas.  At most, may you be inspired to start what you’ve only thought about till now.

Check out Farmhouse Dreams On An Apartment Budget for more DIYing it.

Thanks for reading,

altesa.

P.S.

My DIY Epiphany:  Just start.  You’ll be glad you did.

Ordinary Glory

“Never believe that the so-called random events of life are anything less than God’s appointed order. Be ready to discover His divine designs anywhere and everywhere.”- Oswald. Chambers, My Utmost For His Highest

IMG_6183.JPG

When I allow thanksgiving to invade my ambitious mind, I see strokes of beauty in the day to day part of life; the grocery store runs and Chipotle lines, the wet grass and playgrounds, audition slates, LA traffic (believe it or not), early morning piano for kiddos and last-minute trips to Target. It’s my life, in all its ordinary glory.